
Stripe Payments Setup
GateFuz integrates with Stripe via modern Stripe Elements and PaymentIntents, fully compliant with Strong Customer Authentication (SCA) and 3D Secure 2.
Gateway Configuration Console
Section titled “Gateway Configuration Console”Navigate to GateFuz → Gateways → Stripe to manage keys, testing modes, and webhook signing secrets:
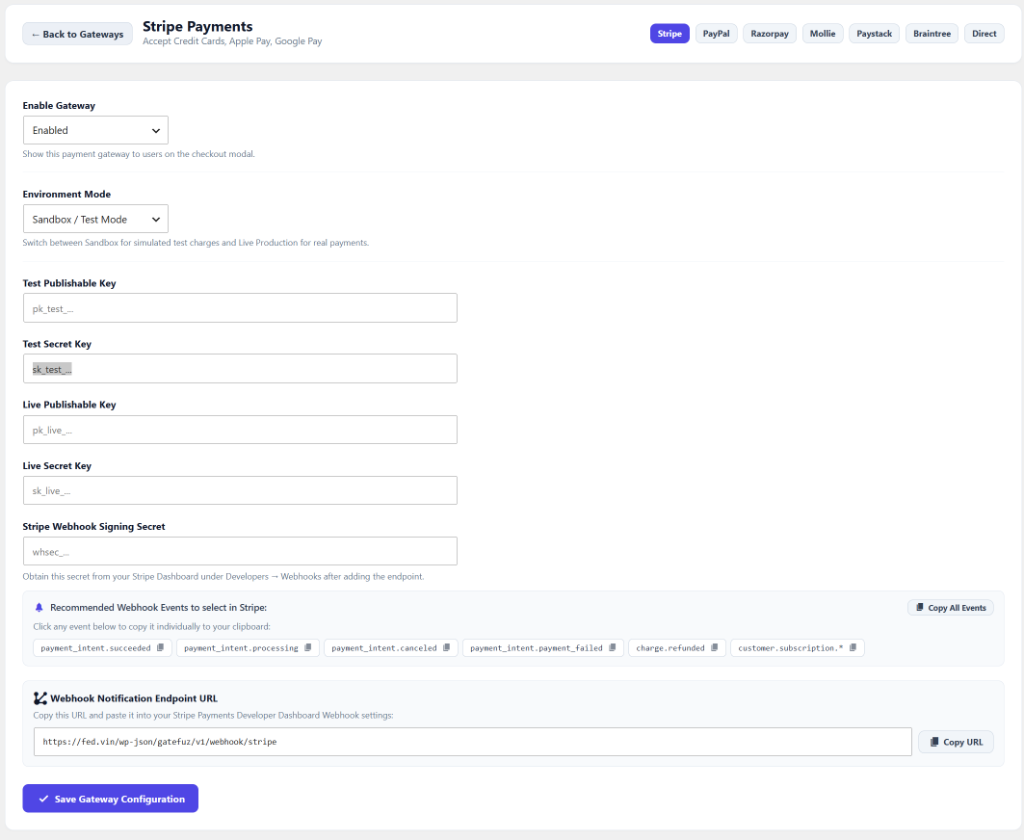
Configuration Fields
Section titled “Configuration Fields”| Setting | Type | Description |
|---|---|---|
| Enable Gateway | Select | Toggle whether Stripe appears in the checkout modal. |
| Environment Mode | Select | Switch between Sandbox / Test Mode and Live Production. |
| Test Publishable Key | String | Public key beginning with pk_test_.... |
| Test Secret Key | String | Private server key beginning with sk_test_.... |
| Live Publishable Key | String | Production public key beginning with pk_live_.... |
| Live Secret Key | String | Production server key beginning with sk_live_.... |
| Webhook Signing Secret | String | Webhook endpoint secret beginning with whsec_... for cryptographic HMAC-SHA256 verification. |
Retrieving API Keys
Section titled “Retrieving API Keys”- Log in to your Stripe Dashboard.
- Navigate to Developers → API keys.
- Copy your Publishable Key and Secret Key.
- To test in Sandbox, toggle the “Viewing test data” switch in Stripe to grab your test keys (
pk_test_...andsk_test_...). - In WordPress, go to GateFuz → Gateways → Stripe and paste both pairs into the corresponding fields.
Configuring Webhooks
Section titled “Configuring Webhooks”To guarantee order fulfillment when customers close their browsers, and to synchronize refunds and subscriptions automatically:
- In your Stripe Dashboard, go to Developers → Webhooks.
- Click Add endpoint.
- For Endpoint URL, paste your GateFuz Stripe webhook URL:
https://example.com/wp-json/gatefuz/v1/webhook/stripe
- Under Events to send, select the full resiliency suite:
payment_intent.succeededpayment_intent.processingpayment_intent.canceledpayment_intent.payment_failedcharge.refundedcustomer.subscription.*
- Click Add endpoint.
- Reveal your Signing secret (
whsec_...) and paste it into GateFuz → Gateways → Stripe → Stripe Webhook Signing Secret.