
Razorpay Gateway Setup
GateFuz supports native Razorpay checkout with instant UPI QR, Google Pay, PhonePe, Paytm, Indian netbanking, and credit/debit cards.
Gateway Configuration Console
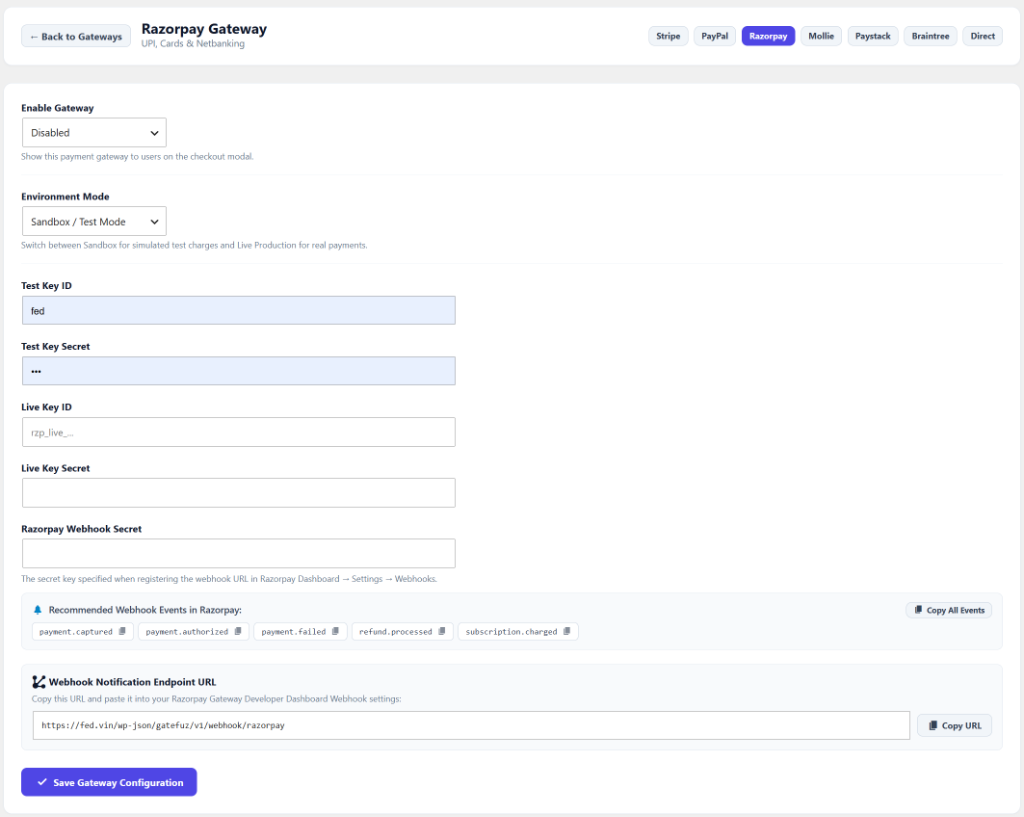
Section titled “Gateway Configuration Console”Navigate to GateFuz → Gateways → Razorpay to configure API keys, test mode, and webhook secret:
Configuration Fields
Section titled “Configuration Fields”| Setting | Type | Description |
|---|---|---|
| Enable Gateway | Select | Toggle whether Razorpay appears in the checkout modal. |
| Environment Mode | Select | Switch between Sandbox / Test Mode and Live Production. |
| Test Key ID | String | Developer Test Key beginning with rzp_test_.... |
| Test Key Secret | Password | Developer Test Secret password. |
| Live Key ID | String | Production Live Key beginning with rzp_live_.... |
| Live Key Secret | Password | Production Live Secret password. |
| Razorpay Webhook Secret | Password | Secret password configured when creating the webhook in Razorpay Dashboard for HMAC-SHA256 signature verification. |
Retrieving Razorpay API Keys
Section titled “Retrieving Razorpay API Keys”- Log in to your Razorpay Dashboard.
- Navigate to Settings → API Keys.
- Click Generate Key (or view existing keys).
- Copy your Key ID (
rzp_test_...orrzp_live_...) and Key Secret. - In WordPress, navigate to GateFuz → Gateways → Razorpay and paste them into the respective Test and Live fields.
Configuring Webhooks & Secret
Section titled “Configuring Webhooks & Secret”- In the Razorpay Dashboard, go to Settings → Webhooks.
- Click Add New Webhook.
- In Webhook URL, paste:
https://example.com/wp-json/gatefuz/v1/webhook/razorpay
- Enter a strong secret password in the Secret field.
- Select the recommended events:
payment.capturedpayment.authorizedpayment.failedrefund.processedsubscription.charged
- Click Save.
- In WordPress, copy the secret password into GateFuz → Gateways → Razorpay → Razorpay Webhook Secret.